How to Create a Custom Responsibility in Oracle Apps R12 EBS
Hey there! Looking to customize user access in Oracle E-Business Suite (EBS) R12? Creating a custom responsibility is a smart way to control what your users can see and do. Let’s walk through this in a few easy steps, so you’ll have it up and running in no time!
Before starting, make sure you have System Administrator access in Oracle EBS.
Step 1: Get to Know the Basics of a Responsibility
Here’s the scoop on what makes a responsibility tick in Oracle EBS:
- Data Group: Controls which database schema users can access.
- Menu: Defines the screens, reports, and functions users see.
- Request Group: Sets which concurrent programs they can run.
For your custom responsibility, you’ll decide on each of these.
Step 2: Open the Define Responsibility Screen
Log in with System Administrator access, and go to Security > Responsibility > Define. This is where we’ll start creating your custom responsibility!

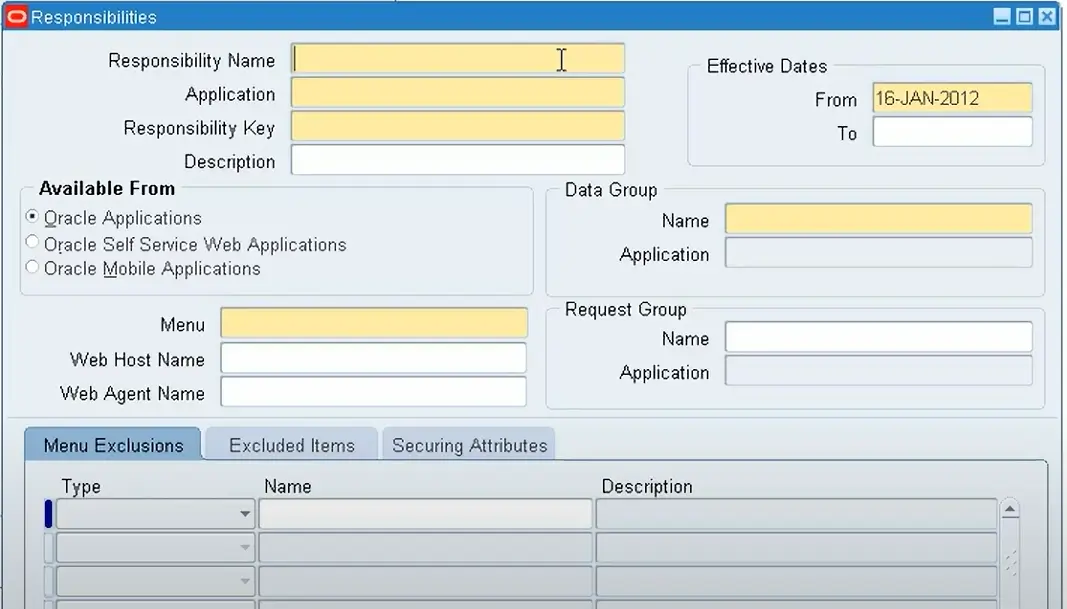
Step 3: Enter Basic Info
Now, let’s give it a name and some key details:
- Responsibility Name: Choose something descriptive, like "Finance Analyst" or "HR Admin."
- Application: Select the application this responsibility applies to, like "General Ledger" or "Inventory."
- Responsibility Key: Enter a unique identifier, like FIN_ANALYST_RESP.
- Description: Optional but helpful for future reference.
Step 4: Set the Data Group and Menu
- Data Group: Select an appropriate data group for the application.
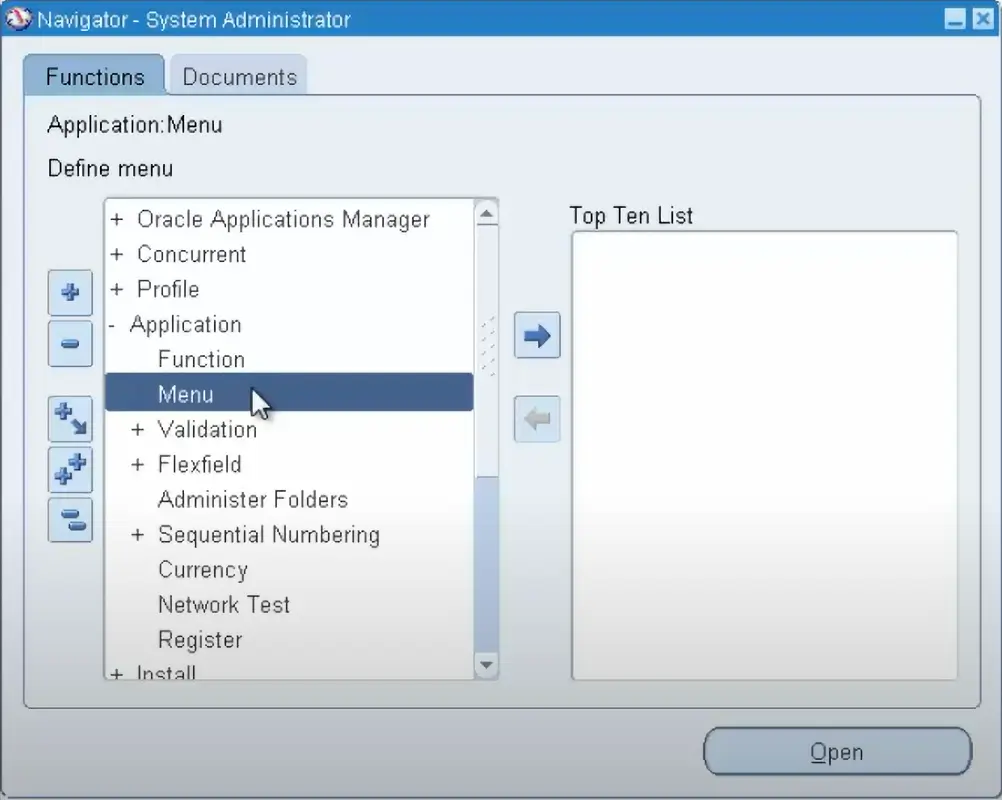
- Menu: Choose an existing menu, or create a custom menu by going to Application > Menu. Add only the specific forms and functions your users need, then assign it here.

Note: Use the Menu Exclusions tab to select specific items you don’t want visible for this responsibility, allowing fine-tuned control.
Step 5: Add a Request Group (Optional but Handy)
This is useful if you want to let users run certain reports or processes:
- Request Group: Choose an existing group or create a new one by going to Security > Responsibility > Request Group and adding the programs or reports you need.
Step 6: Optional Security Settings
Need extra control? Try these options:
- Effective Dates: Set start and end dates for the responsibility’s availability.
- Security Group: Typically set to "Standard." Only change if needed for your organization’s setup.
Step 7: Save and Assign to a User
After you’ve set everything up, click Save. Then, assign it to a user by going to Security > User > Define, locating the user, and adding the responsibility to their list.
Step 8: Test It Out!
Log in as that user (or ask them to) and check:
- Are the correct menu options visible?
- Can they access assigned reports or concurrent programs?
- Do restrictions set through Menu Exclusions work as expected?
That’s It!
Congratulations! You now have a custom responsibility set up in Oracle EBS R12. This allows you to finely control user access, which helps boost productivity and security.
Got questions? Drop them in the comments below. Happy configuring!
